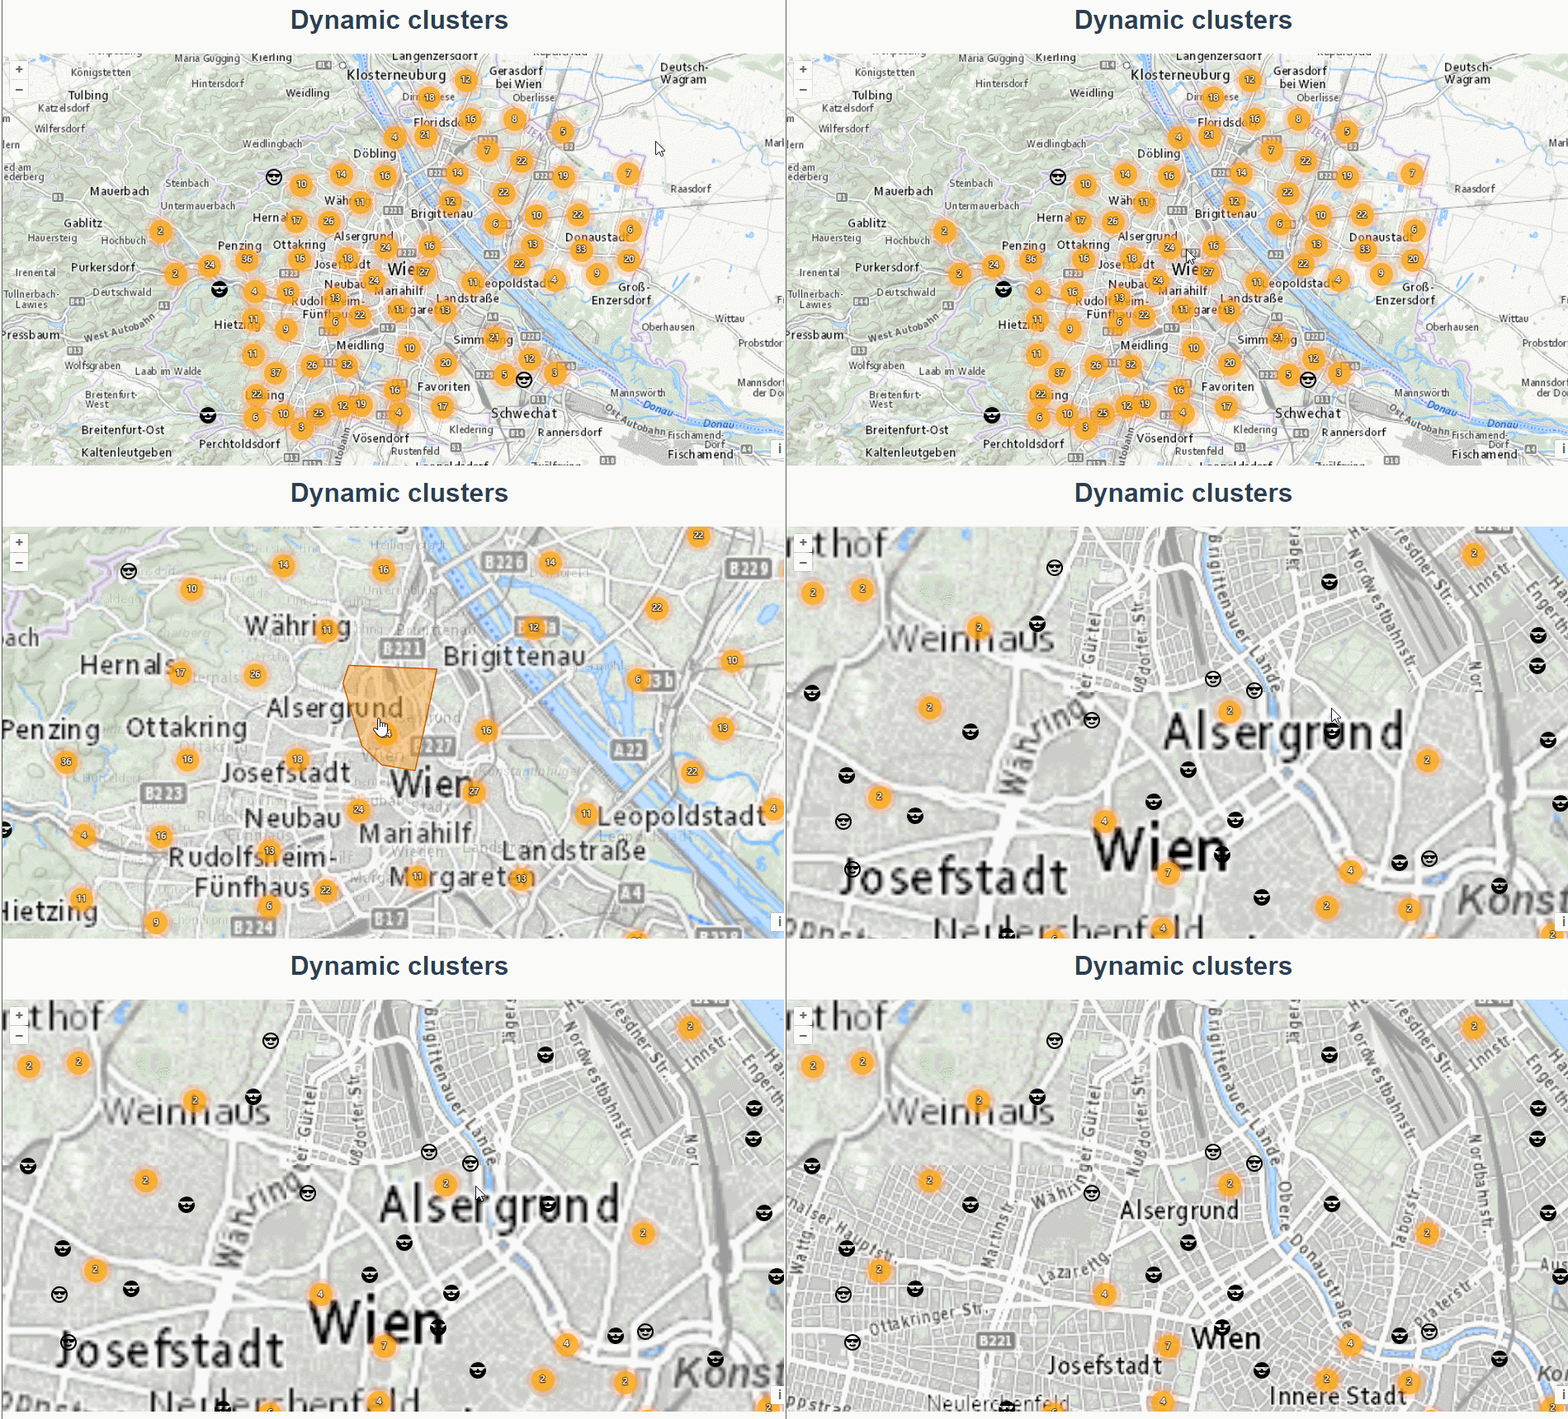
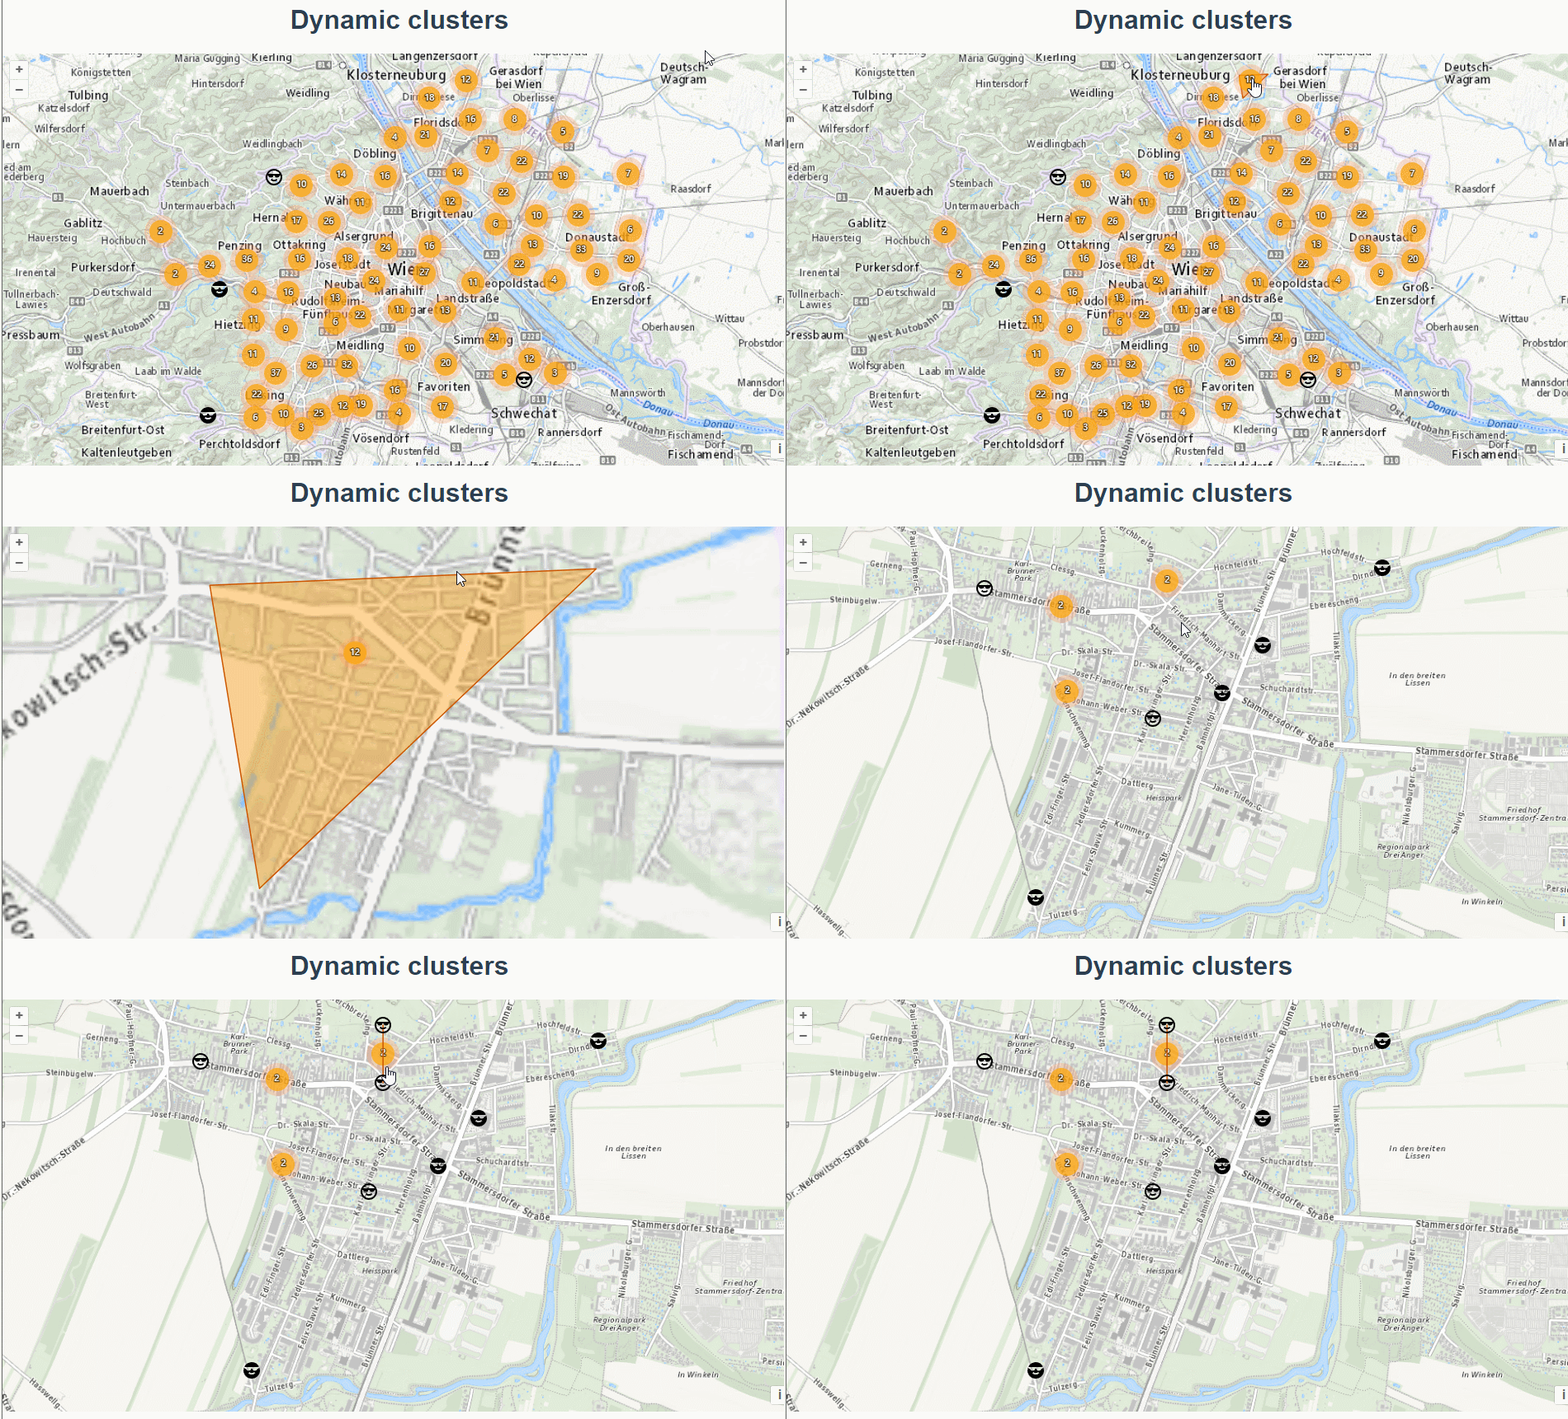
三十四、openlayers官网示例Dynamic clusters解析——动态的聚合图层

官网demo地址:
http://openlayers.org/en/latest/examples/clusters-dynamic.html这篇绘制了多个聚合图层。
先初始化地图 ,设置了地图视角的边界extent,限制了地图缩放的范围
 initMap() {
      const raster = new TileLayer({
        source: new XYZ({
          attributions:
            'Base map: basemap.at',
          url: "http://maps{1-4}.wien.gv.at/basemap/bmapgrau/normal/google3857/{z}/{y}/{x}.png",
        }),
      });

      this.map = new Map({
        layers: [raster],
        target: "map",
        view: new View({
          center: [0, 0],
          zoom: 2,
          maxZoom: 19,
          extent: [
            ...fromLonLat([16.1793, 48.1124]),
            ...fromLonLat([16.5559, 48.313]),
          ],
          showFullExtent: true,
        }),
      });
      this.map.on("pointermove", this.moveEvent);
      this.map.on("click", this.clickEvent);
    },
创建一个聚合数据源,数据是geoJson格式的。
    const vectorSource = new VectorSource({
        format: new GeoJSON(),
        url: "http://openlayers.org/en/latest/examples/data/geojson/photovoltaic.json",
      });

      const clusterSource = new Cluster({
        attributions:
          'Data: Stadt Wien',
        distance: 35,
        source: vectorSource,
      });
然后创建一个聚合图层
      //聚合图层
      this.clustersLayer = new VectorLayer({
        source: clusterSource,
        style: this.clusterStyle,
      });
      this.map.addLayer(this.clustersLayer);
因为每个feature的样式不一样,所以样式这里都绑定了函数。
这里的outerCircle定义为全局变量而并非局部变量,主要是因为clusterStyle函数是个高频触发函数,将outerCircle写成全局的可以不用new那么多次。使用样式组的方法绘制出来了外发光效果,其实就是画了两次圆形。
//黄色圆圈 内外两层 发光效果
    clusterStyle(feature) {
      const size = feature.get("features").length;
      //还有下级
      if (size > 1) {
        return [
          new Style({
            image: this.outerCircle,
          }),
          new Style({
            image: this.innerCircle,
            text: new Text({
              text: size.toString(),
              fill: this.textFill,
              stroke: this.textStroke,
            }),
          }),
        ];
      }
      //没有下级
      const originalFeature = feature.get("features")[0];
      return this.clusterMemberStyle(originalFeature);
    },
this.textFill = new Fill({
color: "#fff",
});
this.textStroke = new Stroke({
color: "rgba(0, 0, 0, 0.6)",
width: 3,
});
this.innerCircle = new CircleStyle({
radius: 14,
fill: new Fill({
color: "rgba(255, 165, 0, 0.7)",
}),
});
this.outerCircle = new CircleStyle({
radius: 20,
fill: new Fill({
color: "rgba(255, 153, 102, 0.3)",
}),
});有下级的时候图形是橙色发光的样式,没有下级的时候。根据feature的LEISTUNG字段显示为不同的icon图形。
clusterMemberStyle(clusterMember) {
      return new Style({
        geometry: clusterMember.getGeometry(),
        image:
          clusterMember.get("LEISTUNG") > 5 ? this.darkIcon : this.lightIcon,
      });
    },
this.darkIcon = new Icon({
src: "data/icons/emoticon-cool.svg",
});
this.lightIcon = new Icon({
src: "data/icons/emoticon-cool-outline.svg",
});创建一个凸包图层。
凸包是包含给定点集的最小凸多边形,在许多计算几何应用中非常重要,如图形学、地理信息系统(GIS)和形状分析。计算凸包的算法通常基于点的排序和几何性质,可以有效地处理大规模的数据。
下载引入monotone-chain-convex-hull
npm i monotone-chain-convex-hull
import monotoneChainConvexHull from "monotone-chain-convex-hull";
//凸包图层样式
this.convexHullFill = new Fill({
color: "rgba(255, 153, 0, 0.4)",
});
this.convexHullStroke = new Stroke({
color: "rgba(204, 85, 0, 1)",
width: 1.5,
}); //凸包图层
this.clusterHulls = new VectorLayer({
source: clusterSource,
style: this.clusterHullStyle,
}); clusterHullStyle(cluster) {
if (cluster !== this.hoverFeature) {
return null;
}
const originalFeatures = cluster.get("features");
const points = originalFeatures.map((feature) =>
feature.getGeometry().getCoordinates()
);
return new Style({
geometry: new Polygon([monotoneChainConvexHull(points)]),
fill: this.convexHullFill,
stroke: this.convexHullStroke,
});
},当鼠标移动到点图层时,显示凸包效果。
  moveEvent(event) {
      this.clustersLayer.getFeatures(event.pixel).then((features) => {
        if (features[0] !== this.hoverFeature) {
          this.hoverFeature = features[0];
          this.clusterHulls.setStyle(this.clusterHullStyle);
          this.map.getTargetElement().style.cursor =
            this.hoverFeature && this.hoverFeature.get("features").length > 1
              ? "pointer"
              : "";
        }
      });
    },
然后是点线图层
this.clusterCircles = new VectorLayer({
        source: clusterSource,
        style: this.clusterCircleStyle,
      });
当前视图的缩放级别达到了最大缩放级别或者范围的宽度和高度都小于当前视图的分辨率
往点线图层的style数组中添加两个样式。。
clusterCircleStyle(cluster, resolution) {
      if (cluster !== this.clickFeature || resolution !== this.clickResolution) {
        return null;
      }
      const clusterMembers = cluster.get("features");
      const centerCoordinates = cluster.getGeometry().getCoordinates();
      return this.generatePointsCircle(
        clusterMembers.length,
        cluster.getGeometry().getCoordinates(),
        resolution
      ).reduce((styles, coordinates, i) => {
        const point = new Point(coordinates);
        const line = new LineString([centerCoordinates, coordinates]);
        styles.unshift(
          new Style({
            geometry: line,
            stroke: this.convexHullStroke,
          })
        );
        styles.push(
          this.clusterMemberStyle(
            new Feature({
              ...clusterMembers[i].getProperties(),
              geometry: point,
            })
          )
        );
        return styles;
      }, []);
    },
generatePointsCircle 方法根据聚类成员的数量、中心坐标和当前分辨率,生成一个圆周上的点坐标数组。
generatePointsCircle(count, clusterCenter, resolution) {
      //计算圆周长度和每个点的角度步长
      const circumference =
        this.circleDistanceMultiplier * this.circleFootSeparation * (2 + count);
      let legLength = circumference / (Math.PI * 2);
      const angleStep = (Math.PI * 2) / count;
      const res = [];
      let angle;
      //调整线段长度 确保线段长度至少为 35,并根据分辨率进行调整。
      legLength = Math.max(legLength, 35) * resolution;
      //生成圆周上的点坐标
      for (let i = 0; i < count; ++i) {
        angle = this.circleStartAngle + i * angleStep;
        res.push([
          clusterCenter[0] + legLength * Math.cos(angle),
          clusterCenter[1] + legLength * Math.sin(angle),
        ]);
      }
      return res;
    },
点击事件时,获取当前点击的feature的边界值,定位到指定位置。
clickEvent(event) {
      this.clustersLayer.getFeatures(event.pixel).then((features) => {
        if (features.length > 0) {
          const clusterMembers = features[0].get("features");
          if (clusterMembers.length > 1) {
            const extent = createEmpty();
            clusterMembers.forEach((feature) =>
              extend(extent, feature.getGeometry().getExtent())
            );
            const view = this.map.getView();
            const resolution = this.map.getView().getResolution();
            //如果当前视图的缩放级别达到了最大缩放级别 如果范围的宽度和高度都小于当前视图的分辨率
            if (
              view.getZoom() === view.getMaxZoom() ||
              (getWidth(extent) < resolution && getHeight(extent) < resolution)
            ) {
              this.clickFeature = features[0];
              this.clickResolution = resolution;
              this.clusterCircles.setStyle(this.clusterCircleStyle);
            } else {
              view.fit(extent, { duration: 500, padding: [50, 50, 50, 50] });
            }
          }
        }
      });
    },
完整代码:
    Dynamic clusters


#map {
  width: 100%;
  height: 500px;
}
.box {
  height: 100%;
}

#info {
  width: 100%;
  height: 24rem;
  overflow: scroll;
  display: flex;
  align-items: baseline;
  border: 1px solid black;
  justify-content: flex-start;
}


