从零开始实现自己的串口调试助手(8)-循环发送
循环发送
准备
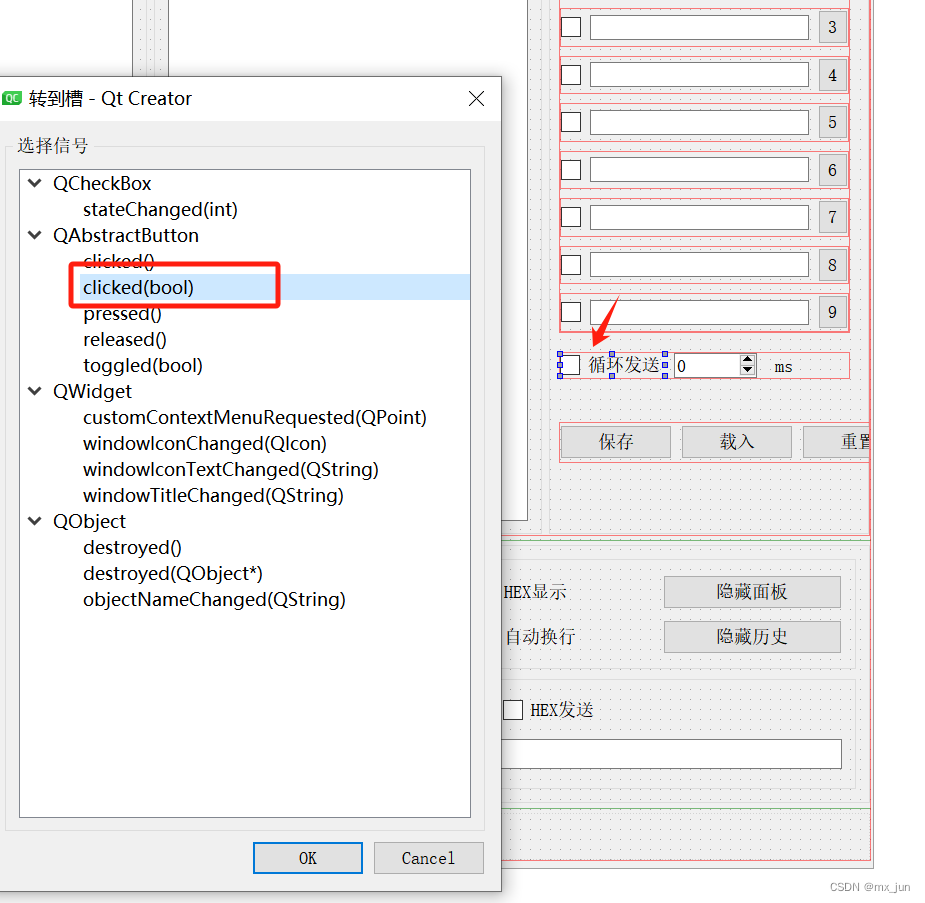
创建槽函数

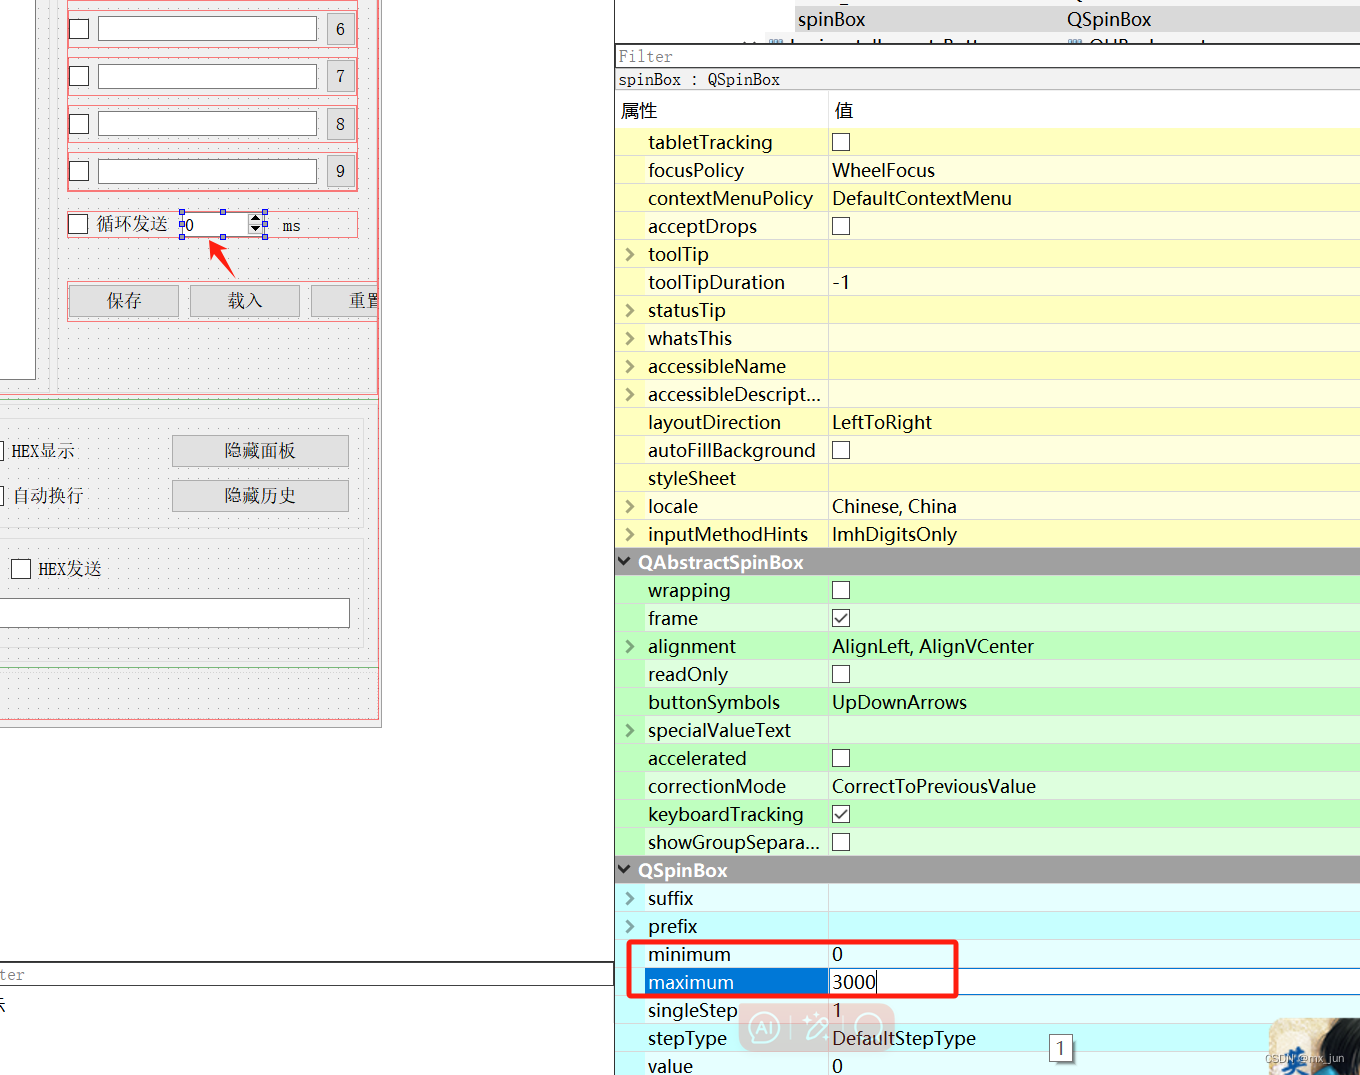
设置QSpinBox的最大值

注意:
// 我们不能在qt的ui线程中延时,否则将导致页面刷新问题
//QThread::msleep(ui->spinBox->text().toInt());//设置下次发送时间间隔
定时器实现
关联信号与槽:
//添加自动换行定时器
btnConTimer = new QTimer(this);
connect(btnConTimer,&QTimer::timeout,this,&Widget::btnHandler);
创建控件处理函数
void Widget::btnHandler()
{
    if(btnIndexclicked(); //发出被点击信号 -->跳到对应处理函数-->发送
        btnIndex++;
    }
    else {
        btnIndex  = 0; // 复位
    }

}
实现定时器控制槽函数
void Widget::on_checkBox_send_clicked(bool checked)
{
    if(checked){ // 循环发送被勾选
        ui->spinBox->setEnabled(false);
        btnConTimer->start(ui->spinBox->text().toInt()); // 根据框内的值设置定时器周期
    }
    else{
        ui->spinBox->setEnabled(true);
        btnConTimer->stop();
    }
}
线程实现:
自定义线程类
customthread.h
#ifndef CUSTOMTHREAD_H
#define CUSTOMTHREAD_H

#include
#include
#include "widget.h"

class customThread : public QThread
{
    Q_OBJECT // 需要用这个宏里面的信号与槽
public:
    customThread(QWidget *parent);

protected:
   void run() override;

signals:
 void  threadTimeout();


};

#endif // CUSTOMTHREAD_H
customthread.cpp
#include "customthread.h"


customThread::customThread(QWidget *parent):QThread(parent)
{

}

void customThread::run()
{
    while (true) {
    msleep(1000);
    emit threadTimeout();//每隔一秒发一次超时信号
    }

}
线程的信号处理
// 自动换行线程初始化
myThread = new customThread(this);
connect(myThread,&customThread::threadTimeout,this,&Widget::btnHandler);
修改槽函数
void Widget::on_checkBox_send_clicked(bool checked)
{
    if(checked){ // 循环发送被勾选
        ui->spinBox->setEnabled(false);
        myThread->start(); //线程开始
        //btnConTimer->start(ui->spinBox->text().toInt()); // 根据框内的值设置定时器周期
    }
    else{
        ui->spinBox->setEnabled(true);
        myThread->terminate();
        //btnConTimer->stop();
    }
}
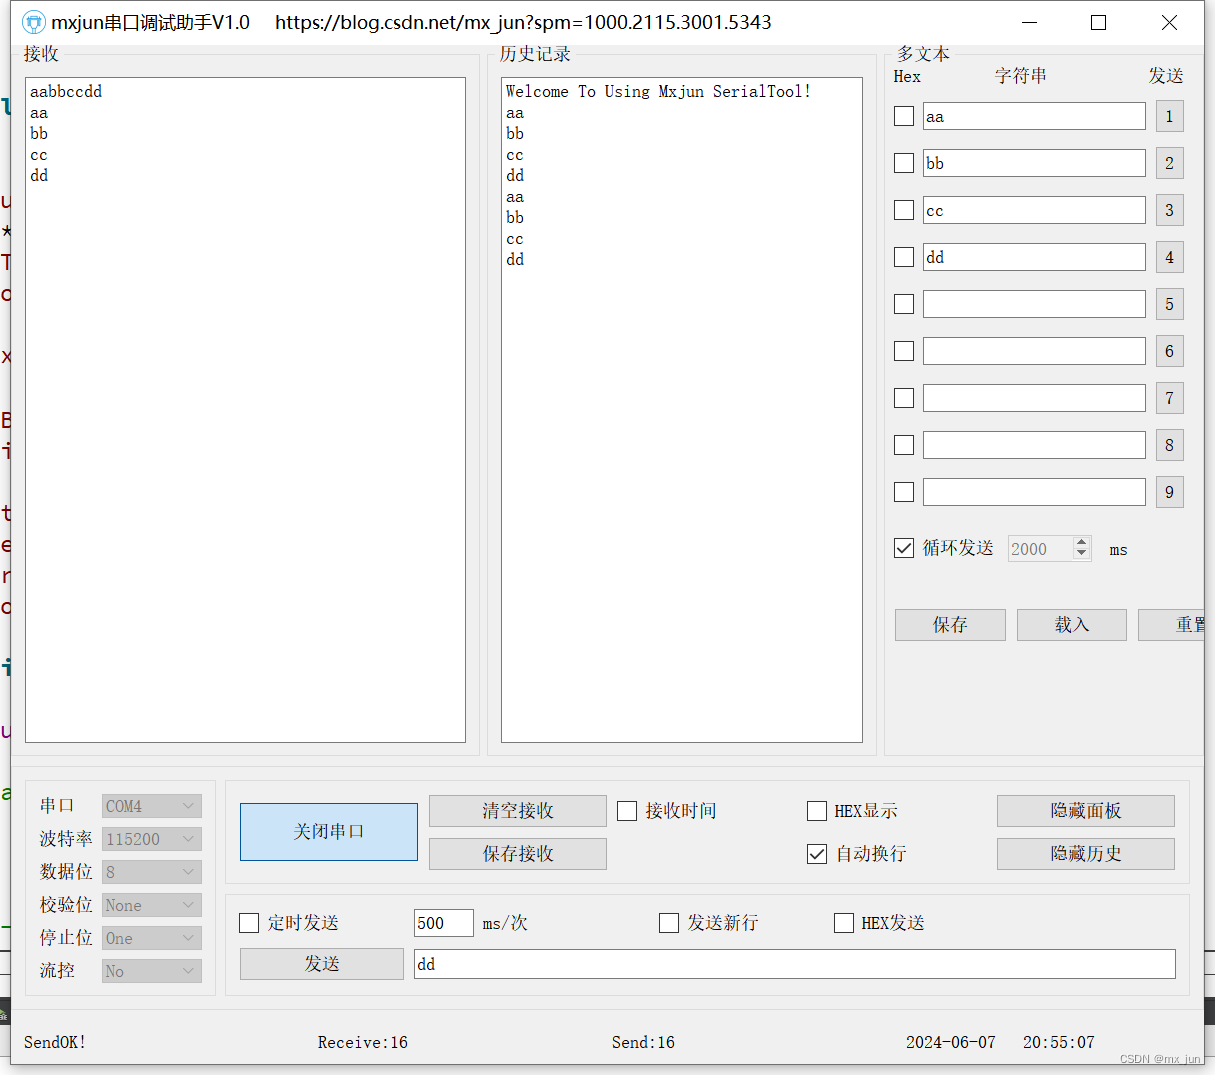
实现效果


