【pip安装】YOLOv8目标检测初步上手
说明:本篇blog是关于Ultralytics官方教程的学习笔记,环境为windows+conda
1、下载安装YOLOv8
1.1 YOLOv8介绍
Ultralytics YOLOv8 是一个尖端的、最先进的(SOTA)模型,它建立在以前 YOLO 版本的成功基础之上,并引入了新功能和改进,以进一步提高性能和灵活性。
YOLOv8 旨在快速、准确且易于使用,使其成为广泛的对象检测和跟踪、实例分割、图像分类和姿态估计任务的极佳选择。
1.2 环境准备
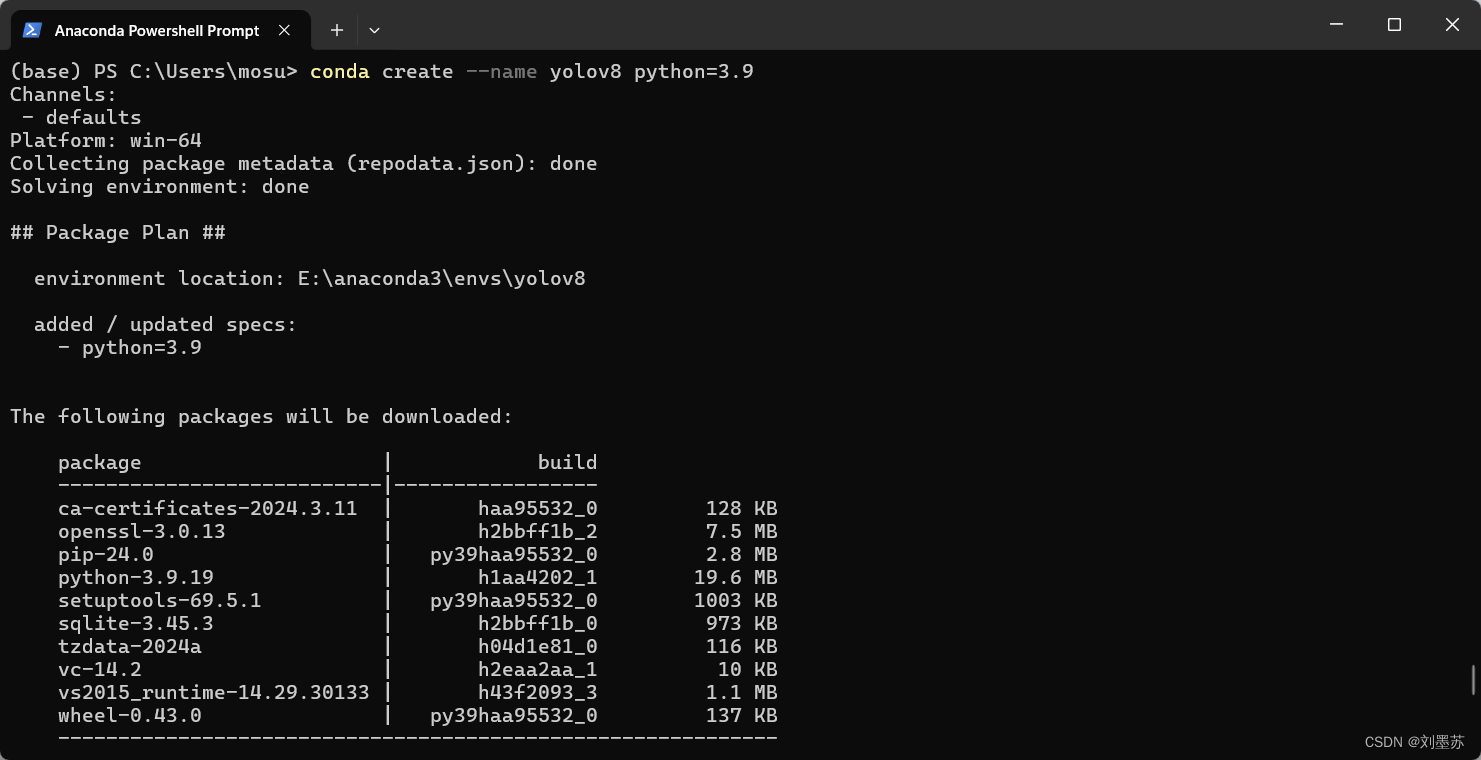
# 新建虚拟环境,要求 Python>=3.8
conda create --name yolov8 python=3.9
# 激活环境
conda activate yolov8
# 关闭环境
conda deactivate

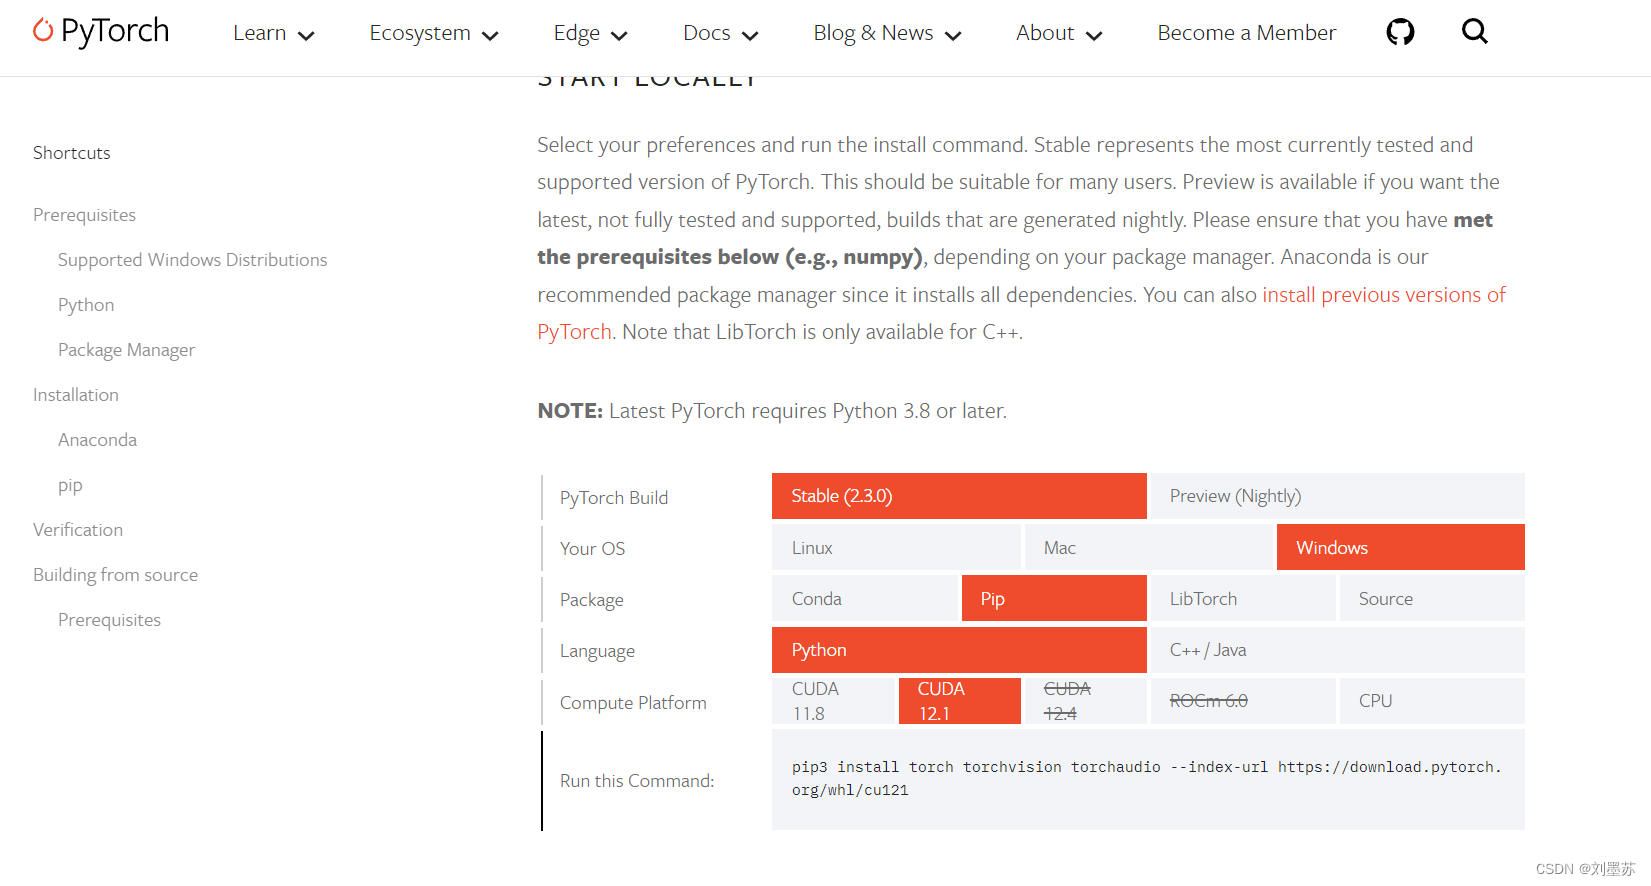
# 安装 PyTorch, PyTorch>=1.8.
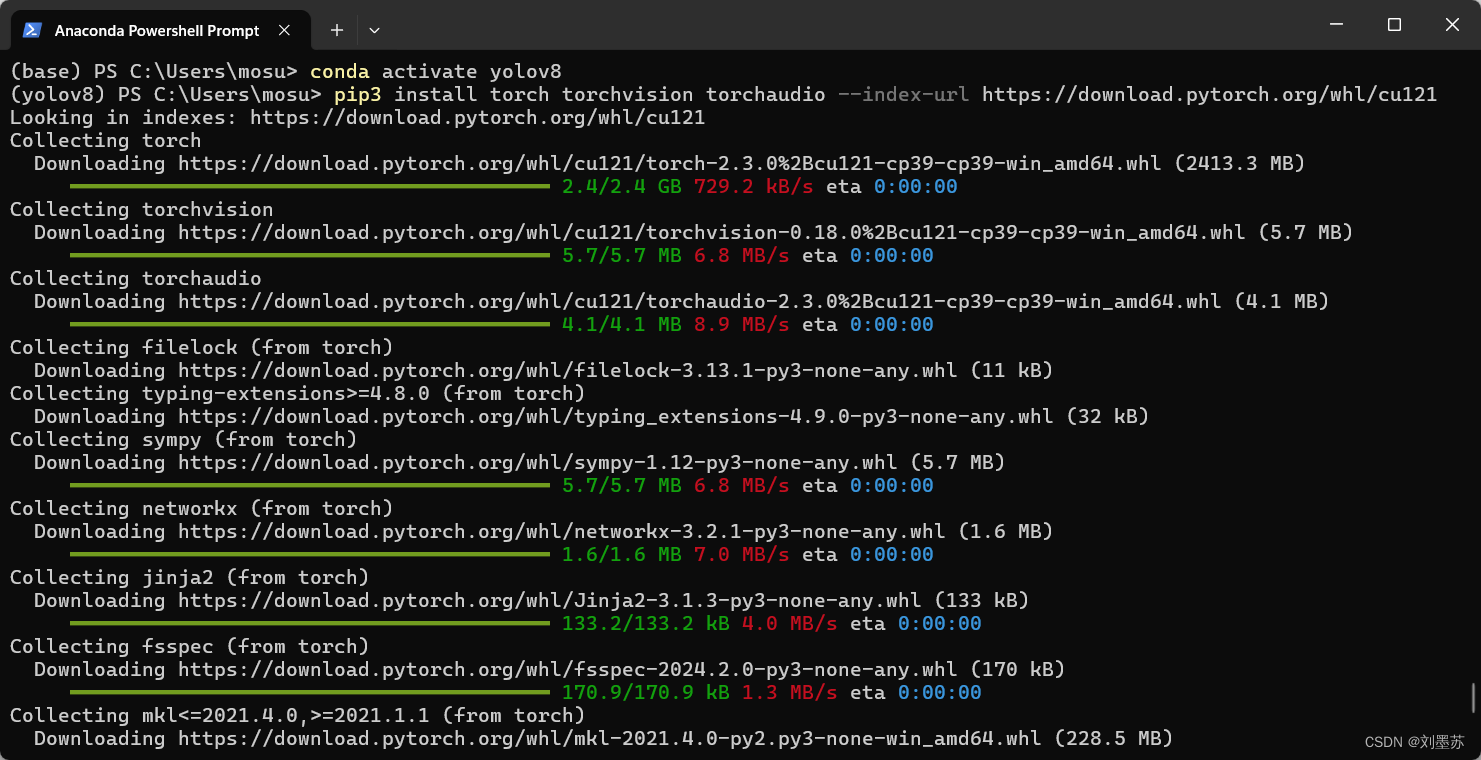
pip3 install torch torchvision torchaudio --index-url http://download.pytorch.org/whl/cu121
1.3 YOLOv8下载
Github地址:http://github.com/ultralytics/ultralytics
可以通过点击Download Zip进行下载,按照Github中的介绍部分,还可以通过pip进行下载

# pip下载yolov8
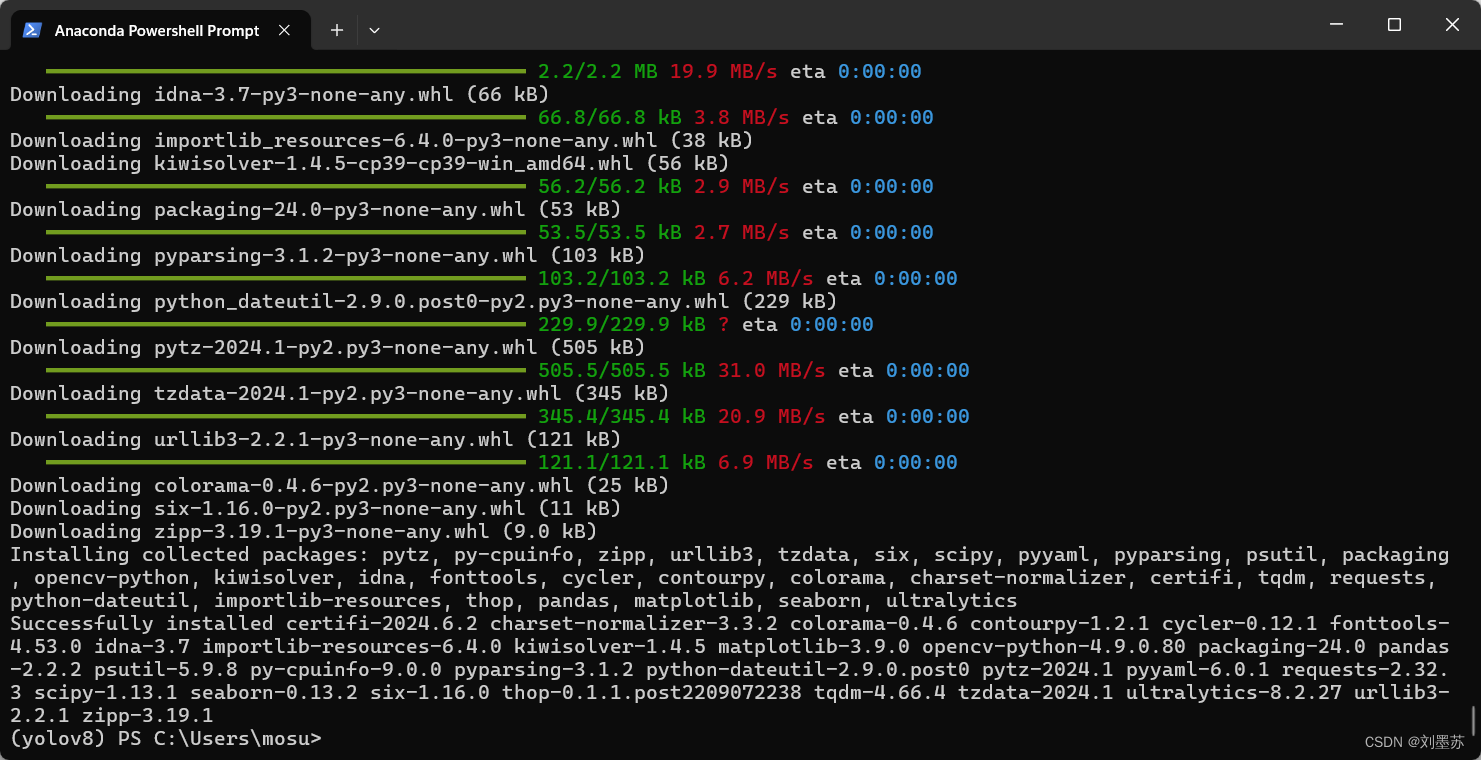
pip install ultralytics
Pip install the ultralytics package including all requirements(指的是requirements.txt内提供的依赖包)
2、运行YOLOv8
2.1 两行代码调用
from ultralytics import YOLO

# Load a model
model = YOLO("yolov8n.pt")

# Run inference on the source
results = model(source=“one.jpg”, show=True, conf=0.4, save=True)

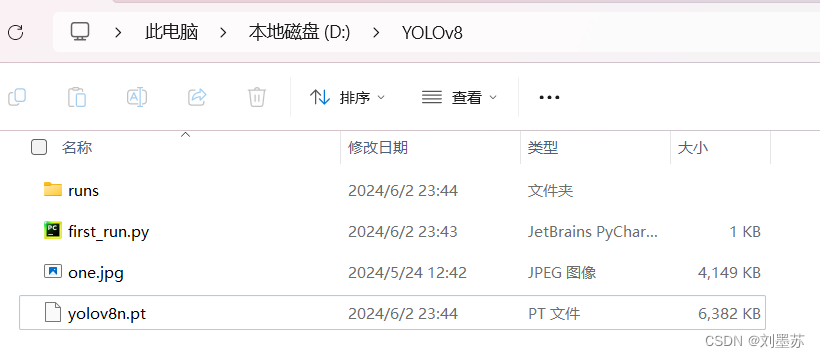
在代码目录下载了yolov8n.pt,和生成了runs文件夹
2.2 返回内容
文档链接🔗:http://docs.ultralytics.com/modes/predict/
Ultralytics YOLO模型在推理时会返回一个Python列表的Result对象,或者在传递了stream=True参数给模型时会返回一个内存高效的Python生成器的Result对象
from ultralytics import YOLO

# Load a model
model = YOLO("yolov8n.pt")  # pretrained YOLOv8n model

# Run batched inference on a list of images
results = model(["im1.jpg", "im2.jpg"])  # return a list of Results objects 返回Results对象的列表

# Process results list
for result in results:
    boxes = result.boxes  # Boxes object for bounding box outputs
    masks = result.masks  # Masks object for segmentation masks outputs
    keypoints = result.keypoints  # Keypoints object for pose outputs
    probs = result.probs  # Probs object for classification outputs
    obb = result.obb  # Oriented boxes object for OBB outputs
    result.show()  # display to screen
    result.save(filename="result.jpg")  # save to disk
from ultralytics import YOLO

# Load a model
model = YOLO("yolov8n.pt")  # pretrained YOLOv8n model

# Run batched inference on a list of images
results = model(["im1.jpg", "im2.jpg"], stream=True)  # return a generator of Results objects

# Process results generator
for result in results:
    boxes = result.boxes  # Boxes object for bounding box outputs
    masks = result.masks  # Masks object for segmentation masks outputs
    keypoints = result.keypoints  # Keypoints object for pose outputs
    probs = result.probs  # Probs object for classification outputs
    obb = result.obb  # Oriented boxes object for OBB outputs
    result.show()  # display to screen
    result.save(filename="result.jpg")  # save to disk
2.3 推理源设置
文档链接🔗:http://docs.ultralytics.com/modes/predict/#inference-sources
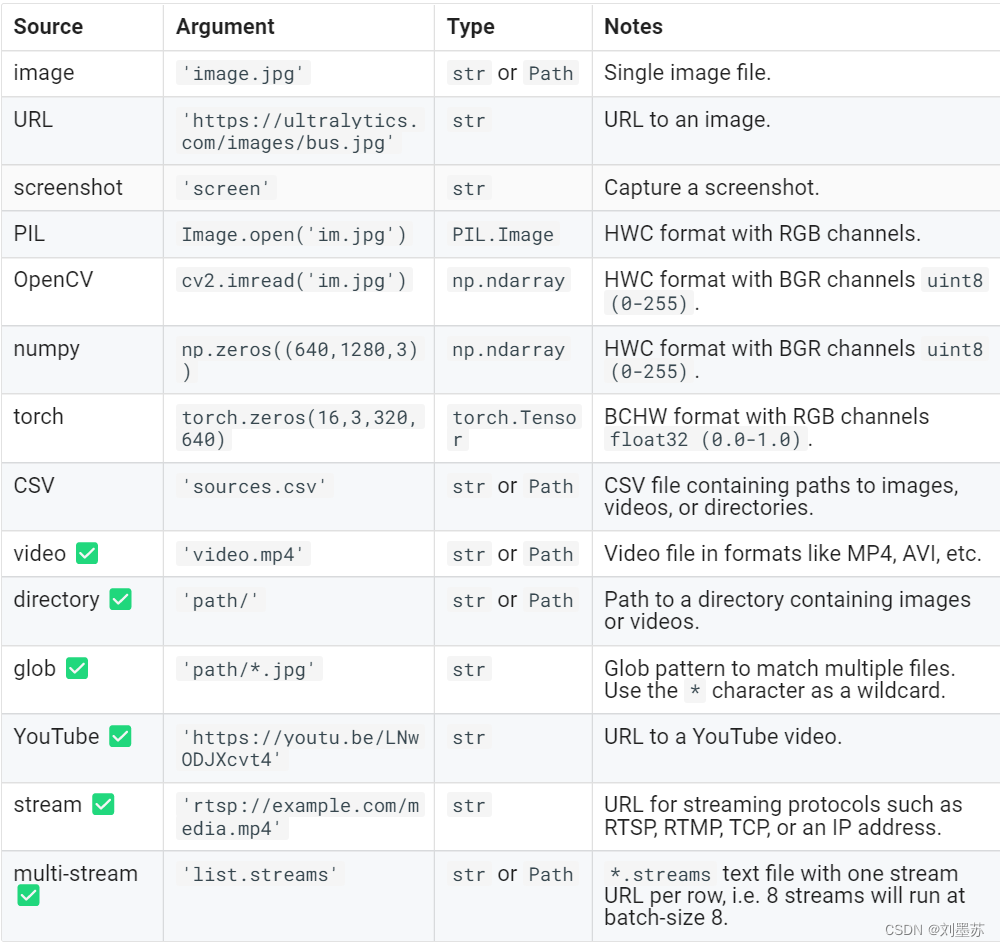
YOLOv8 能够处理不同类型的输入源进行推理,如下表所示。
这些输入源包括静态图像、视频流以及各种数据格式。表格还指示了每种输入源是否可以在流模式下使用,即通过参数 stream=True ✅ 来启用。
流模式适用于处理视频或实时流,因为它生成结果的生成器而不是将所有帧加载到内存中。
使用 stream=True 来处理长视频或大型数据集,可以有效地管理内存。当 stream=False 时,所有帧或数据点的结果都会存储在内存中,这可能会迅速累积并导致大型输入的内存不足错误。相比之下,stream=True 利用生成器,它只保留当前帧或数据点的结果在内存中,显著降低了内存消耗并防止了内存不足的问题。
2.4 推理参数设置
文档链接🔗:http://docs.ultralytics.com/modes/predict/#inference-arguments
model.predict() 在推理时接受多个参数,可以在推理时传递这些参数以覆盖默认设置
from ultralytics import YOLO

# Load a pretrained YOLOv8n model
model = YOLO("yolov8n.pt")

# Run inference on 'bus.jpg' with arguments
model.predict("bus.jpg", save=True, imgsz=320, conf=0.5)
更多内容可以看文档,文档写的非常详细


